ANDES xlsx#
The ANDES xlsx format allows one to use Excel for convenient viewing and editing. If you do not use Excel, there are alternatives such as the free and open-source LibreOffice.
Format definition#
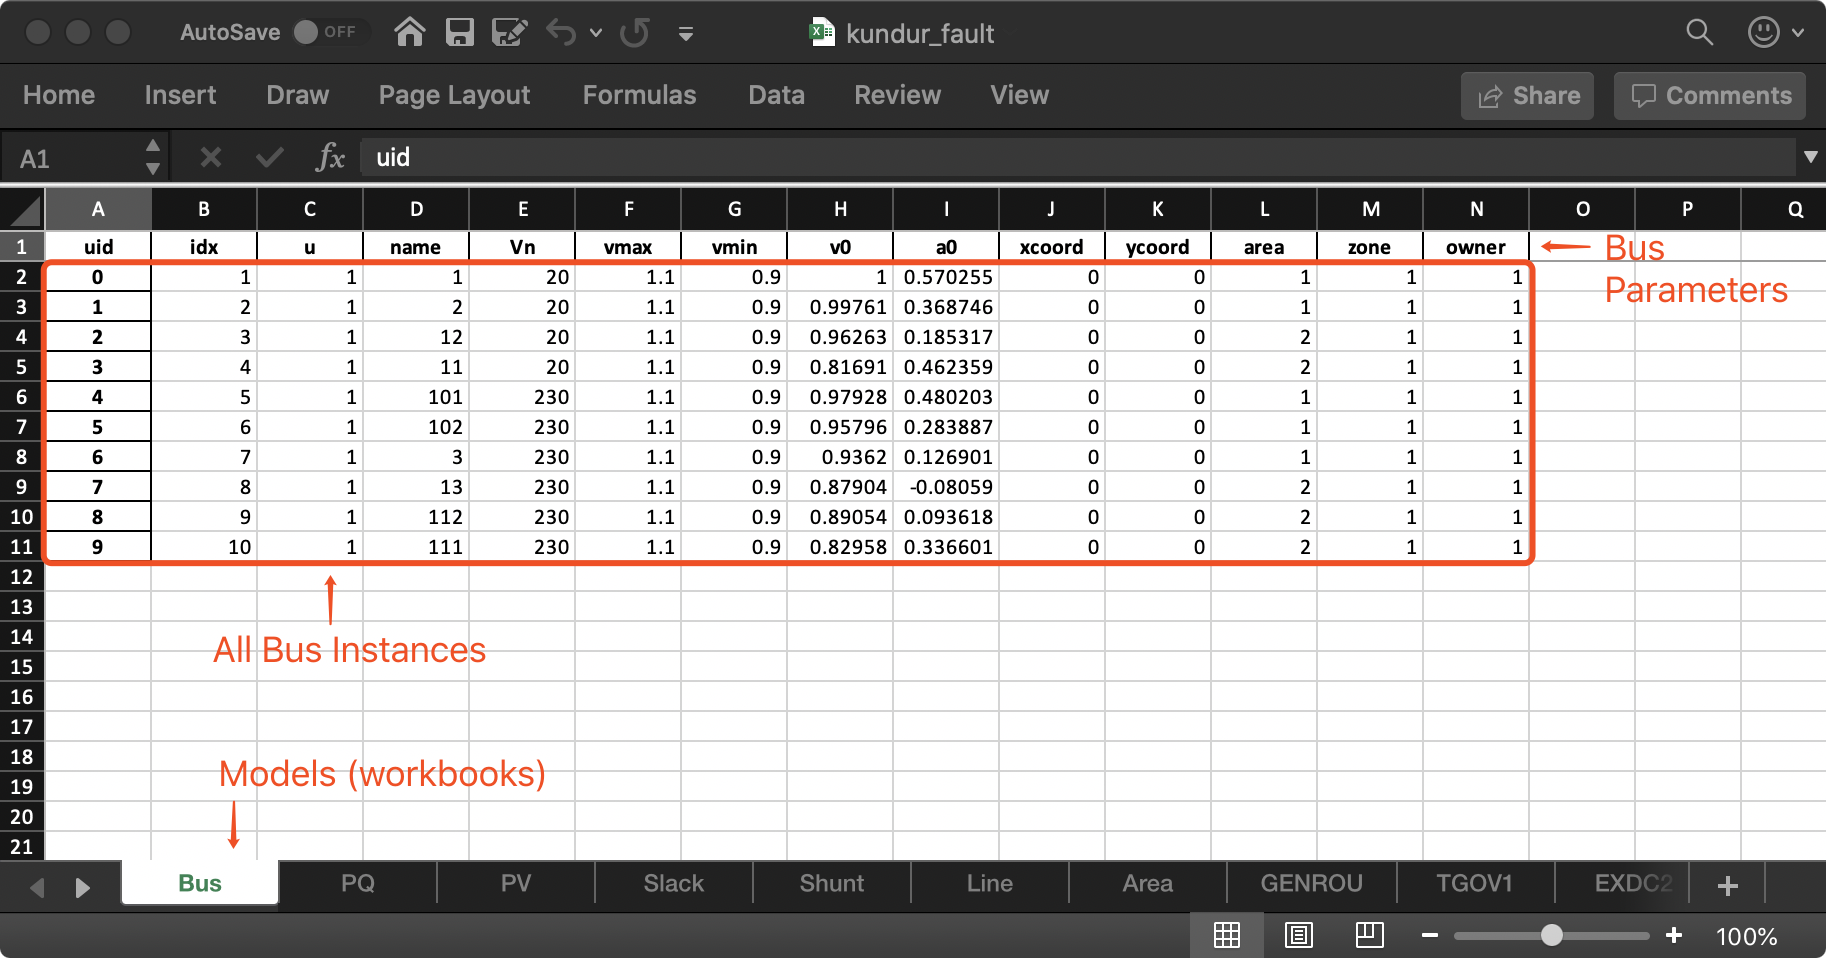
The ANDES xlsx format contains multiple workbooks (also known as "sheets") shown as tabs at the bottom. The name of a workbook is a model name, and each workbook contains the parameters of all devices that are instances of the model.
In each sheet, the first row contains the names of parameters of the model.
Starting from the second row, each row corresponds to a device instance with
the parameters in the corresponding columns. An example of the Bus sheet
is shown in the following screenshot.
Common parameters#
A few columns are used across all models. That includes uid, idx,
name and u:
uidis an unique index that is generated and used internally. This column can be left empty when the sheet is being created manually. Exporting systems toxlsxwith--convert(see Format converter) will have theuidoverwritten.idxis the unique index to identify a device of the model. An uniqueidxshould be provided explicitly for each instance for best consistency. Accepted types foridxinclude numbers and strings without spaces.
Warning
ANDES will check the uniqueness of idx and assign new ones when
duplication is detected. Duplicate idx indicates data inconsistency and
will likely cause simulations to fail.
uis the connectivity status of the instance. Accepted values are 0 for disconnected (turned off) and 1 for connected (turned on). Disconnected devices will still have the variables assigned in ANDES but will not interact with the simulation. Unexpected behaviors may occur if numerical values other than 0 and 1 are assigned, asuis often used as a multiplier in equations.nameis the name for the device instance. It is used for display purposes and can be left empty.
Connecting devices#
Most importantly, idx is the unique index for referencing a device, so
that it can be properly connected by supported devices. In a system, a PQ
(constant PQ load) device needs to connect to a Bus device to inject power. That
is, the PQ device needs to indicate the Bus device to which it is connected.
Such connection is done in the PQ sheet by setting the bus parameter to
the idx of the connected bus.
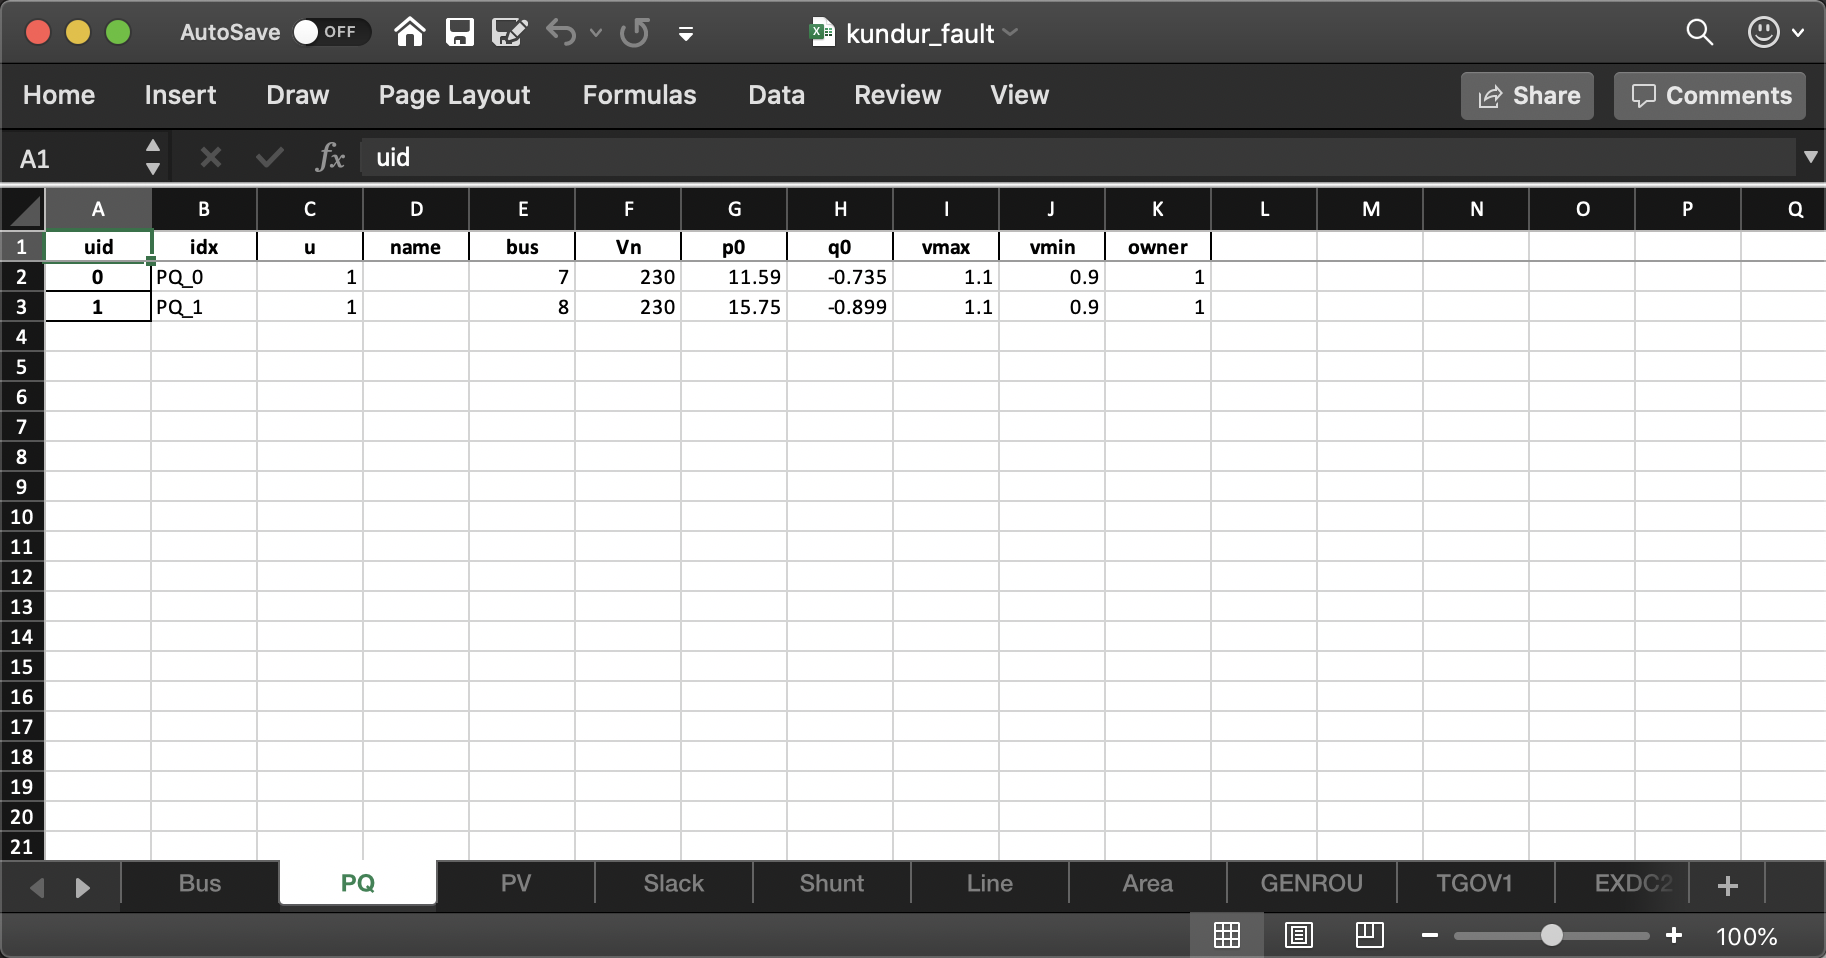
The screenshot above is from the case file
andes/cases/kundur/kundur_fault.xlsx. In this PQ workbook, there are two
PQ instances (also known as "devices") called PQ_0 and PQ_1 (referred to
by idx). They are connected to buses 7 and 8, respectively. The
bus parameter of PQ is konwn as an indexing parameter
(andes.core.param.IdxParam) through which the connections are
specified. To get the connection actually work, on the Bus sheet, two rows
must exist for two bus devices, respectively, with idx being 7 and
8.
To find out the IdxParams of a device for connecting to other devices, refer to
Model reference. For example, to find out how a device of the exciter model
EXDC2 should be connected to a synchronous generator, in the
Parameters section, check the Properties column for mandatory
parameters. Almost all IdxParams are mandatory, meaning that they must be
specified to build a consistent test case. It can be seen that for EXDC2,
syn is mandatory. From the description, one can tell that this is the
"Synchronous generator idx", which should be the idx of an existing
synchronous generator, i.e., GENROU or GENCLS.
Typically, models of the same group use the same IdxParams to connect to other
models. Each link on the left sidebar of Model reference is a group, such as the
Exciter group. With this convention, all exciters have a syn
parameter for connecting to synchronous generators.
Creating cases#
It is often easier to modify from existing cases than creating from scratch. We recommend that you get familiar with the cases available with ANDES, see Test Cases.
Adding devices#
Adding devices to an existing workbook is straightforward. Navigate to the sheet corresponding to the model and add a new line below the existing lines.
Almost all models have so-called mandatory parameters. They are essential to
describe a complete and consistent test case. For example, the PQ model has
the bus parameter as mandatory to indicate the connected bus. To look up
mandatory parameters, see Model reference or use andes doc MODEL_NAME.
Check for "mandatory" in the last column called "Properties". This column also
contains other data consistency requirements discussed in the following.
Non-mandatory parameters are optional, meaning that if not provided, ANDES will
use the default parameters. The default values can also be found in
Model reference. This does not mean that such parameters should always be left
blank. For example, the p0 (active power load) of PQ is optional, but
likely one wants to set it to a non-zero value.
There are consistency requirements for parameters, such as non_zero,
non_negative or non_positive. If unmet, the default values will be used.
See the class reference in andes.core.param.NumParam.
Autofill data#
When you finished adding devices but left some optional parameters empty, you can use ANDES to autofill them. This is useful when you want to populate a large number of devices with the same parameters that can be modified later.
The autofill is done through the data converter, namely, --convert or
-c. ANDES will read in the Excel file, fill the optional parameters with
default values, fix the inconsistent values, and then export the data back to
Excel.
Warning
Please backup the spreadsheet if it contains customized edits. Inconsistent data will be replaced during the conversion. Formatting in the spreadsheet will be lost. Unrecognized sheets will also be discarded.
To autofill kundur_full.xlsx, do
andes run kundur_full.xlsx -c
You will be prompted to confirm the overwrite.
Since this autofill feature utilizes the converter, the autofilled data can be
exported to other formats, such as .json. To do so, use -c json.
Adding workbooks#
If one wants to add workbooks for models that does not exist in an xlsx file,
one can use --add-book ADD_BOOK (or -b ADD_BOOK), where ADD_BOOK can
be a single model name or comma-separated model names (without space). For
example,
andes run kundur_full.xlsx -b Fault
will add an empty Fault sheet to kundur_full.xlsx.
Warning
With --add-book, the xlsx file will be overwritten with the same
parameter corrections as in the autofill. Please make backups as needed.
Format conversion and workbook addition can be performed together. To convert a
PSS/E raw file and a dyr file into an xlsx file and add a workbook for Fault, do
andes run kundur.raw -addfile kundur_full.dyr -c -b Fault
The output will have the same name as the raw file.
Data Consistency#
Input data needs to have consistent types for idx. Both string and numerical
types are allowed for idx, but the original type and the referencing type
must be the same. Suppose we have a bus and a connected PQ. The Bus device may
use 1 or '1' as its idx, as long as the PQ device uses the same
value for its bus parameter.
The ANDES xlsx reader will try to convert data into numerical types when
possible. This is especially relevant when the input idx is string literal
of numbers, the exported file will have them converted to numbers. The
conversion does not affect the consistency of data.
Parameter Check#
The following parameter checks are applied after converting input values to array:
Any
NaNvalues will raise aValueErrorAny
infwill be replaced with \(10^{8}\), and-infwill be replaced with \(-10^{8}\).